Facial landmark detection is still easy with MediaPipe (2023 update)

In 2023, MediaPipe has seen a major overhaul and now provides various new
features in addition to a more versatile API.
While code from
my older post
still works (as of writing - November 2023, mediapipe==0.10.7), I want to
briefly take a look at the new API and recreate the
rotating face using it.
Recap: What is MediaPipe?
MediaPipe1 is an open-source library providing ready-to-use AI solutions for popular tasks in computer vision, audio processing and more. With only a few lines of code, you can create powerful applications that leverage pre-trained and optimized deep learning models. MediaPipe supports multiple platforms - even mobile - and offers APIs in C++, JavaScript and Python.
The pre-trained models are provided through the MediaPipe Tasks API. You can see the full list of solutions here. For example, there are models for image classification and segmentation, face detection and audio classification. In addition, some of the provided models can even be further customized. Using the Model Maker, you can leverage transfer learning to fine-tune a model for your specific application - more on that in this post.
Installing MediaPipe for Python
MediaPipe for Python is installed with:
|
|
Additionally, you will have to download the pre-trained models for each task you
want to perform.
For this post, we will only get the FaceLandmarker from
here.
Download the appropriate .task or .tflite file containing the pre-trained
models you need.
Running MediaPipe tasks in Python
The new programming interface is similar across all available tasks. In order to run a model, you first need to perform the following steps:
- import MediaPipe
1import mediapipe as mp - define basic and model-specific options
1
2
3
4
5
6
7
base_options = mp.tasks.BaseOptions( model_asset_path="path/to/model.task", ) options = mp.tasks.vision.FaceLandmarkerOptions( base_options=base_options, running_mode=mp.tasks.vision.RunningMode.IMAGE, ) - initialize the model
1
2
with mp.tasks.vision.FaceLandmarker.create_from_options(options) as landmarker: ... - prepare inputs (
mp.Imagefor vision,AudioDatafor audio tasks).1 2 3# e.g.: image from OpenCV cv_image = cv2.cvtColor(cv2.imread("filename.png"), cv2.COLOR_BGR2RGB) mp_image = mp.Image(image_format=mp.ImageFormat.SRGB, data=cv_image)
Finally you can run the model like below.
|
|
The code above is showcased with the FaceLandmarker task, but other tasks
are performed in the same manner.
For example, to run an image classifier you would need to swap the
FaceLandmarker(Options) for the ImageClassifier(Options) classes and
call .classify() instead of .detect().
Detecting face landmarks in Python
Here is a complete example of how to use MediaPipe’s FaceLandmarker solution to detect 478 facial landmarks from an image. The locations of each landmark are detailed in the documentation here.
|
|
Retrieving landmark coordinates as a NumPy array
The primary output provided by the face landmarker are landmark positions for
each detected face given in normalized image coordinates.
Each item in the results.face_landmarks list is itself a list of
NormalizedLandmark containers.
We can convert these landmarks to a numpy array of pixel coordinates with the
following function.
|
|
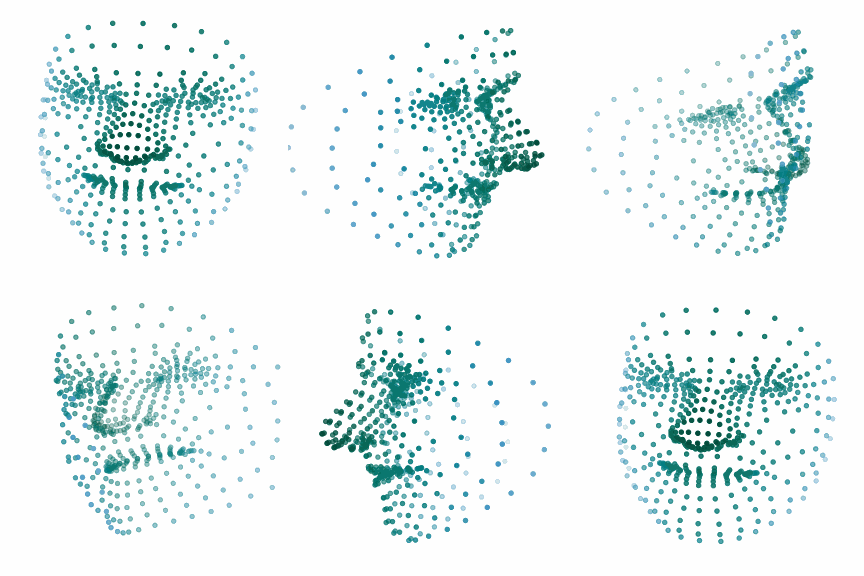
Combining the above tools and matplotlib, we can create a nice animation of the 3D landmarks. See the script below for more details.

|
|
Conclusion
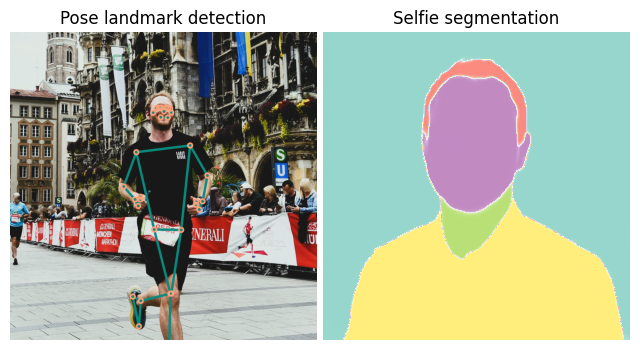
With the new MediaPipe Tasks API, applying computer vision models for common applications is still incredibly easy. A few lines of code provide the basis for wide-ranging opportunities. This post shows how to retrieve facial landmarks. But MediaPipe offers a few more solutions such as image/audio classification, selfie segmentation or pose detection (see below).
The discussed code only shows how to get the landmark coordinates. If you want to see how this could be used in action, check out my previous post about extracting heartbeat signals from webcam video.
Finally, keep in mind that MediaPipe is still in active development. The API could still see changes and some solutions may be altered significantly or even removed in a later version.

(References)
-
C. Lugaresi et al., “MediaPipe: A Framework for Building Perception Pipelines,” 2019, arXiv:1906.08172v1. ↩︎